

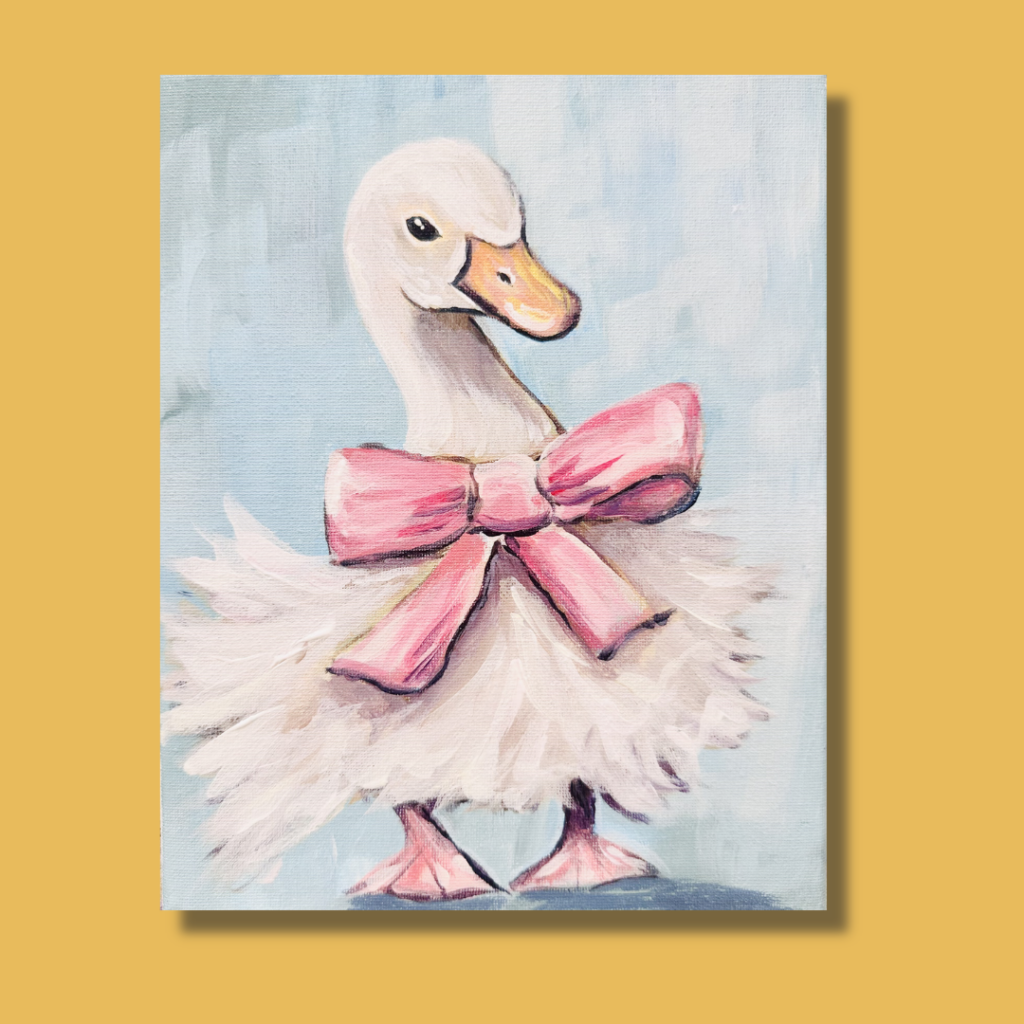
Have you ever looked at a blank canvas and felt that “what do I do now?” anxiety? Today, we are conquering that feeling with a Creative Win. We’re painting a charming, sophisticated white duck in a loose, Impressionist style.
The best part? We’re doing the whole thing with just Primary Colors (Red, Yellow, Blue) plus black and white.
🎨 Supply List
Before we dive in, grab your gear:
- Canvas: 8×10
- Paint: Primary Red, Yellow, Blue, plus Black and White.
- Brushes: 1″ Flat, 1/2″ Flat, and a Small Round brush.
- The “Secret Weapon”: [Download my FREE Traceable Sketch here] so you can skip the drawing and get straight to the color!
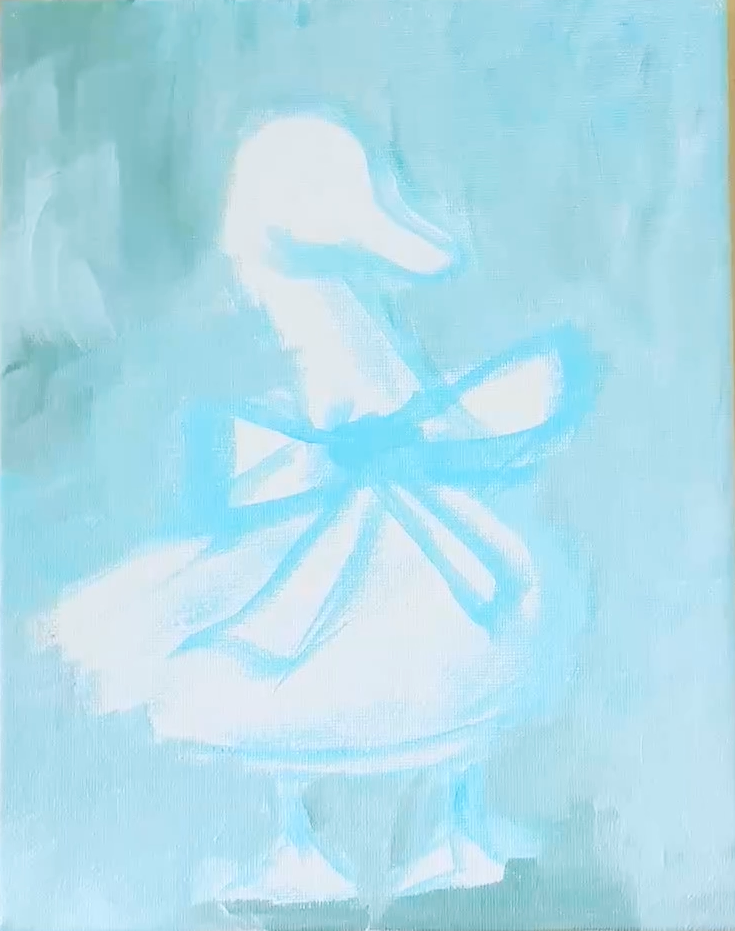
Step 1: The Luminous Background
Using your 1″ Flat brush, we’re going to create a soft, “airy” background. Mix a large amount of white with a tiny touch of blue and a speck of black and/or red to create a misty grey-blue. Use long, horizontal strokes. Don’t worry about making it perfectly smooth—visible brushstrokes are the heart of Impressionism! In this step you will also create a loose sketch of the duck and bow shapes.
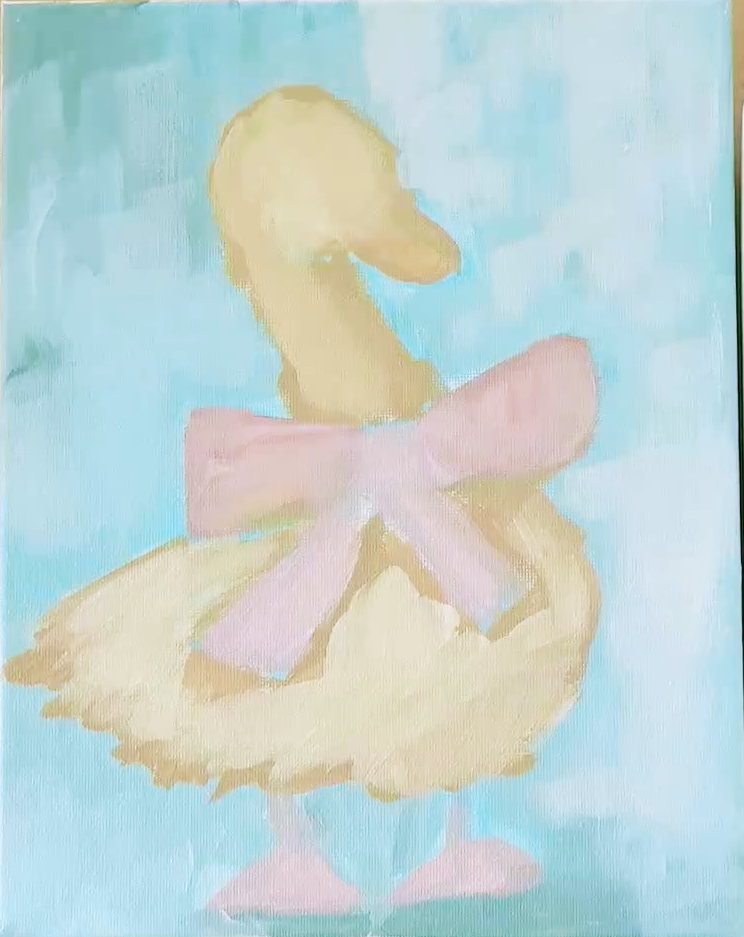
Step 2: Blocking in the Duck
If you’re using the traceable, you already have your guide! Take your 1/2″ Flat brush and block in the duck with off white (mix all the primaries together and then add 90% white). Don’t worry about being “neat.” We want those edges to look a little bit “fuzzy” to represent feathers. You will also fill in the feet and bow with a pink (white +red mix, add some yellow for a warmer peachy pink).
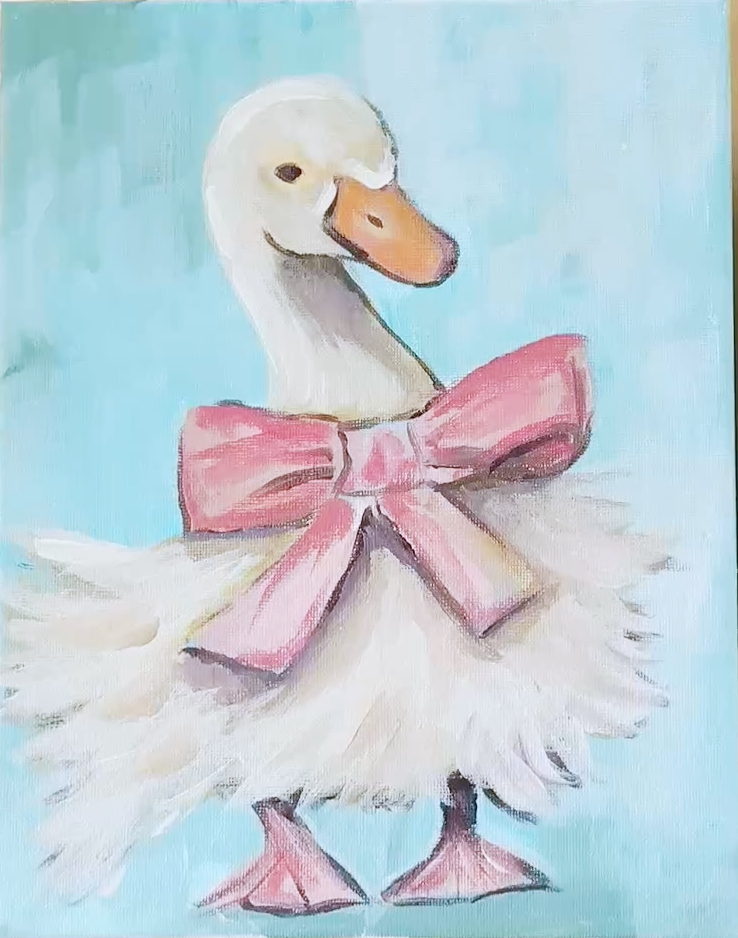
Step 3: Mixing the “Magic” Purple Shadows
This is where the duck becomes 3D. Instead of using blue or black for shadows, we are mixing a soft purple (Red + Blue + add white to soften).
- Apply this purple almost outlining with a small round brush, and going under things like under the bow and under the body, along the curve of the neck, and at the base of the feathers. Create the facial features outline like the face and eye.

Step 4: The Statement Bow 🎀
Now for the star of the show! Use your Small Round brush to mix a “Ballet Slipper Pink” (Red + White + a tiny dot of Yellow to warm it up).
- Paint the center knot first, then the two loops, and finally the ribbons hanging down.
- Pro Tip: Use a slightly darker pink (more Red) for the folds of the bow to give it dimension.
Step 5: Beak, Feet, and Personality
Mix your Primary Red and Yellow to get a warm orange for the beak and feet. Simply add a little more yellow to the pink and use that to layer color on the beak. The feet can use a more orange color or simply keep them more pinkish its up to you. But having at least 3 shades and don’t loose your shadows is key!
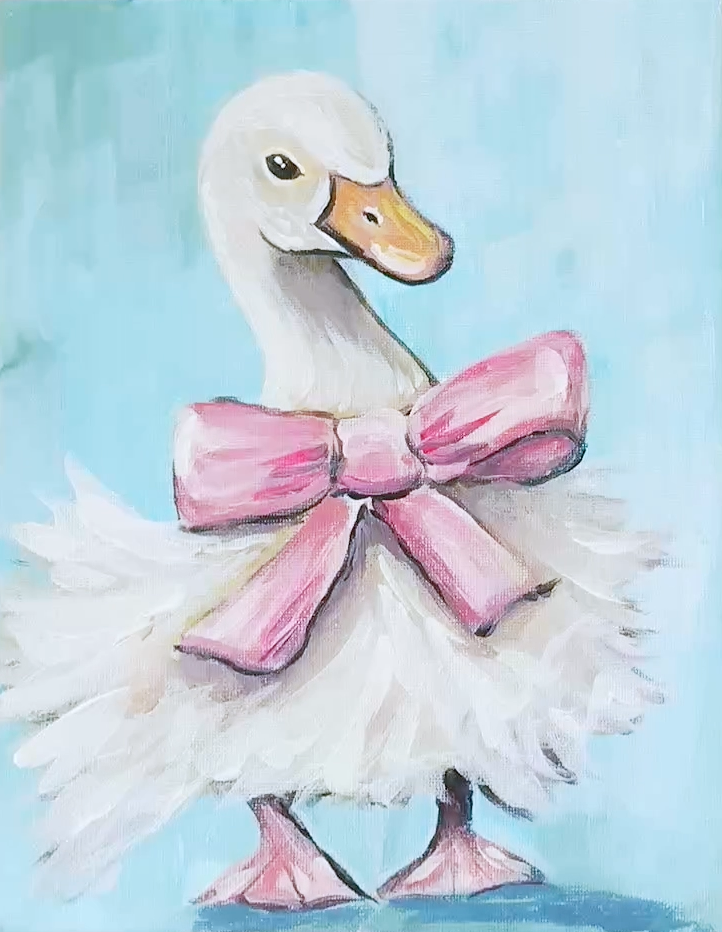
Step 6: The Final “Fluff”
Go back in with your 1/2″ Flat brush and some pure Titanium White. “Dab” or “flick” the brush at the bottom of the duck to create those loose, impressionist feathers. This is the most satisfying part of the whole process! Adjust your shadows and highlights by going back and forth to adding more dark purple or even black and back to mid and light values to brighten where needed.
Use your Small Round brush for the eye—a simple black dot with a tiny “sparkle” of white will bring your duck to life instantly.
🥳 You Did It!
Congratulations on your Creative Win! You’ve turned three simple colors into a piece of art that’s full of personality.
Want to see these steps in motion and get a FREE outline traceable download?
Join the Community: Did you paint this duck? I want to see her! Tag me on Instagram @wendyandersonart so I can celebrate your masterpiece.


+ show Comments
- Hide Comments
add a comment